
- Published on
- Last updated:
How to use cache in NestJS with Redis

This is a deep-dive tutorial on how to use cache in a NestJS application.
We'll start by using the NestJS cache manager which, by default, will store the cache in memory. We will then configure the cache to be stored in Redis.
In this tutorial, we'll use the Pokemon API to demonstrate how to leverage some different caching strategies. Check out the Github repo if you'd like to jump straight into the code!
⚠️ Please note the following tutorial is based on NestJS v10.
Ready? Let's go!

Table of Contents
Registering the cache manager
Begin by installing the cache manager package:
npm install @nestjs/cache-manager cache-manager
To enable caching, import the CacheModule into your app.module.ts file:
import { Module } from '@nestjs/common';
import { CacheModule } from '@nestjs/cache-manager';
import { AppController } from './app.controller';

@Module({
  imports: [CacheModule.register()],
  controllers: [AppController],
})
export class AppModule {}
When interacting with any module in NestJS, you'll need to import it into the respective module. For example, if you have a Pokemon module with a controller and service and you'd like to use caching in this module, then you'd need to import (and register) the caching module into the pokemon.module.ts file like we've done above in the app.module.ts file.
Typically, caching is used across multiple modules so I prefer to leverage the isGlobal property in the app.module.ts file like this:
import { Module } from '@nestjs/common';
import { CacheModule } from '@nestjs/cache-manager';
import { AppController } from './app.controller';

@Module({
  imports: [CacheModule.register({ isGlobal: true })],
  controllers: [AppController],
})
export class AppModule {}
Setting isGlobal: true will make the cache available to all modules in the application, meaning you won't need to import the cache module into each module!
Auto-caching responses
Let's dive into a NestJS caching example on how we can automatically cache the response of requests.
For example, here's a controller and endpoint for getting a pokemon:
import { Controller, Get, Param } from '@nestjs/common';
import { PokemonService } from './pokemon.service';

@Controller('pokemon')
export class PokemonController {
  constructor(private readonly service: PokemonService) {}

  @Get('/:id')
  async getPokemon(@Param('id') id: number): Promise<string> {
    return await this.service.getPokemon(+id);
  }
}
This controller calls a Pokemon service method called getPokemon() to return the response.
Let's use the cache manager to first check if the response is in cache before calling the service method by using the @UseInterceptors decorator:
import { Controller, Get, Param, UseInterceptors } from '@nestjs/common';
import { CacheInterceptor } from '@nestjs/cache-manager';
import { PokemonService } from './pokemon.service';

@Controller('pokemon')
export class PokemonController {
  constructor(private readonly service: PokemonService) {}

  @UseInterceptors(CacheInterceptor) // Automatically cache the response for this endpoint
  @Get('/:id')
  async getPokemon(@Param('id') id: number): Promise<string> {
    return await this.service.getPokemon(+id);
  }
}
The default expiration time of cache is 5 seconds. You can override this by using the @CacheTTL decorator:
import { Controller, Get, Param, UseInterceptors } from '@nestjs/common';
import { CacheInterceptor } from '@nestjs/cache-manager';
import { PokemonService } from './pokemon.service';

@Controller('pokemon')
export class PokemonController {
  constructor(private readonly service: PokemonService) {}

  @UseInterceptors(CacheInterceptor)
  @CacheTTL(30) // override TTL to 30 seconds
  @Get('/:id')
  async getPokemon(@Param('id') id: number): Promise<string> {
    return await this.service.getPokemon(+id);
  }
}
The interceptor autogenerates the key for the cache entry based on the route path. You can also override this if you want to set a custom key:
import { Controller, Get, Param, UseInterceptors } from '@nestjs/common';
import { CacheInterceptor } from '@nestjs/cache-manager';
import { PokemonService } from './pokemon.service';

@Controller('pokemon')
export class PokemonController {
  constructor(private readonly service: PokemonService) {}

  @UseInterceptors(CacheInterceptor)
  @CacheKey('custom-key')
  @CacheTTL(30) // override TTL to 30 seconds
  @Get('/:id')
  async getPokemon(@Param('id') id: number): Promise<string> {
    return await this.service.getPokemon(+id);
  }
}
And that's it! It's worth mentioning that the @UseInterceptors decorator only works on Get requests, and is not currently supported in GraphQL resolvers. So basically, you can just use the @CacheInterceptor decorator on any REST Get endpoint.
Injecting the cache manager
Let's say we have a service that calls an external API and the response from this API isn't so dynamic (i.e. it doesn't change very often).
We could cache the response from the external API so we don't have to call the API each time the service method is called.
Note this is a different approach to the previous section which focused on caching the response of a request. This approach, however, is slightly more advanced and allows you to be more specific with your caching.
Let's look at an example. Here's a service that calls an external API:
import { HttpService } from '@nestjs/axios'
import { Injectable } from '@nestjs/common'

@Injectable()
export class PokemonService {
  constructor(private readonly httpService: HttpService) {}

  async getPokemon(id: number): Promise<string> {
    const { data } = await this.httpService.axiosRef.get(`https://pokeapi.co/api/v2/pokemon/${id}`)
    return await `${data.name}`
  }
}
Let's now use the cache manager (by injecting in the constructor) to cache the response from the API:
import { HttpService } from '@nestjs/axios';
import { CACHE_MANAGER } from '@nestjs/cache-manager';
import { Inject, Injectable } from '@nestjs/common';
import { Cache } from 'cache-manager';

@Injectable()
export class PokemonService {
  constructor(
    private readonly httpService: HttpService,
    @Inject(CACHE_MANAGER) private cacheService: Cache,
  ) {}

  async getPokemon(id: number): Promise<string> {
    const { data } = await this.httpService.axiosRef.get(
      `https://pokeapi.co/api/v2/pokemon/${id}`,
    );
    await this.cacheService.set(id.toString(), data);
    const cachedData = await this.cacheService.get(id.toString());
    console.log('data set to cache', cachedData);
    return await `${data.name}`;
  }
}
If you're following along with the tutorial, you'll see some data logged in your console after the call to the service.
This log is getting data from the cache!
Let's now update the service to first check if the data is in the cache before calling the API:
import { HttpService } from '@nestjs/axios';
import { CACHE_MANAGER, Inject, Injectable } from '@nestjs/common';
import { Cache } from 'cache-manager';

@Injectable()
export class PokemonService {
  constructor(
    private readonly httpService: HttpService,
    @Inject(CACHE_MANAGER) private cacheService: Cache,
  ) {}

  async getPokemon(id: number): Promise<string> {
    // check if data is in cache:
    const cachedData = await this.cacheService.get<{ name: string }>(
      id.toString(),
    );
    if (cachedData) {
      console.log(`Getting data from cache!`);
      return `${cachedData.name}`;
    }

    // if not, call API and set the cache:
    const { data } = await this.httpService.axiosRef.get(
      `https://pokeapi.co/api/v2/pokemon/${id}`,
    );
    await this.cacheService.set(id.toString(), data);
    return await `${data.name}`;
  }
}
Nice! This is great because it improves the performance of the application (getting data from cache will typically be much quicker than calling an external API).
Add some type safety with generics
To add some type safety to your caching, you can leverage Typescript Generics which is built into the get method of the cache manager.
If you look into the source code of the get method, you'll see that it takes a generic type as a parameter.
get<T>(key: string): Promise<T | undefined>;
So in the previous section when we checked to see if the data was in cache before calling the API, you'll notice I used a generic:
const cachedData = await this.cacheService.get<{ name: string }>(id.toString())
The name property is now available in the cachedData variable.
Redis setup and configs
So we've covered some different caching strategies above but the cache is stored in memory.
This is where Redis comes in, the most popular persistent cache solution.
To use Redis instead of the in-memory cache, we'll need to update the cache module configuration and also set up a local Redis server.
First, install the relevant packags:
npm install cache-manager-redis-store@2
npm install --save-dev @types/cache-manager-redis-store
By explicitly installing cache-manager-redis-store@2 and the provided types in @types/cache-manager-redis-store, it ensures the redis store is compatible with the cache manager. You will face some type errors in your IDE otherwise!
Then tweak the cache module to use Redis with the following configs:
import { Module } from '@nestjs/common';
import { CacheModule } from '@nestjs/cache-manager';
import { PokemonModule } from './pokemon/pokemon.module';
import * as redisStore from 'cache-manager-redis-store';

@Module({
  imports: [
    CacheModule.register({
      isGlobal: true,
      store: redisStore,
      host: 'localhost',
      port: 6379,
    }),
    PokemonModule,
  ],
})
export class AppModule {}
If, however, you now try and spin up your local server with npm run start:dev, you'll get the following error:
Error: connect ECONNREFUSED 127.0.0.1:6379
That's because we haven't got a local Redis server up and running!
Use Docker compose for local Redis server
Thankfully, this is super easy to do with Docker Compose.
Add a Docker Compose file at the root of your project:
touch docker-compose.yml
And in the Docker Compose file, add the following:
services:
  redis:
    container_name: cache
    image: redis
    ports:
      - 6379:6379
    volumes:
      - redis:/data

volumes:
  redis:
    driver: local
Then run docker-compose up in your terminal to start the Redis server.
This will start a Redis server on port 6379 and will store the cache between restarts of your container (that's what the volumes configs are for).
Now that your local Redis server is working, if you try again to spin up your local NestJS app with npm run start:dev, it should now be working!
Your cached data will now persist to your local Redis server.
You can confirm in your GUI of choice (I like TablePlus) by sending a request to your NestJS app where caching is used and you'll see the data is now persisted:


If you're looking for a more detailed guide on how to run NestJS as a container alongside Redis, check out this post.
Use environment variables with the config module
Okay so we've got it working locally, but what about deploying our application to production?
Our current Redis configs are limited to working just locally (as you can see above, the host points to localhost). To setup the configs for multiple environments, we will of course use environment variables.
We'll use the NestJS config module to take care of this.
First, install the config package:
npm i --save @nestjs/config
Then in the app.module.ts file, import the config module, ensuring it's at the top of the list. If you place this below the other imports, they won't have access to process.env.
import { Module } from '@nestjs/common';
import { CacheModule } from '@nestjs/cache-manager';
import { PokemonModule } from './pokemon/pokemon.module';
import * as redisStore from 'cache-manager-redis-store';
import { ConfigModule } from '@nestjs/config';

@Module({
  imports: [
    ConfigModule.forRoot() // make sure you import the ConfigModule first like this
    CacheModule.register({
      isGlobal: true,
      store: redisStore,
      host: 'localhost',
      port: 6379,
    }),
    PokemonModule,
  ],
})
export class AppModule {}
You could now add REDIS_HOST and REDIS_PORT to your .env file and update the Redis config values by using process.env like this:
import { Module } from '@nestjs/common';
import { CacheModule } from '@nestjs/cache-manager';
import { PokemonModule } from './pokemon/pokemon.module';
import * as redisStore from 'cache-manager-redis-store';
import { ConfigModule } from '@nestjs/config';

@Module({
  imports: [
    ConfigModule.forRoot()
    CacheModule.register({
      isGlobal: true,
      store: redisStore,
      host: process.env.REDIS_HOST,
      port: process.env.REDIS_PORT,
    }),
    PokemonModule,
  ],
})
export class AppModule {}
However, it's best practice to import them from a custom config file and use the NestJS config module.
That's a little beyond the scope of this tutorial (you'd be using async configuration), but I'll be publishing a more in-depth tutorial on how to do this in the future.
If you now make sure you have an env file at the root of your project with the Redis config values in it and spin up your local NestJS app and Redis server, it will still work as expected, but now you can use the environment variables to configure your Redis configs.
Using Redis in production with NestJS
There are plenty of options to choose from when it comes to deploying your Redis server.
For example, Heroku and Redis Labs offer freemium plans.
Let's set up with Redis Labs as it's a super quick set up.
After creating a free account, they automatically create a Redis instance for you after you've chosen the cloud provider:

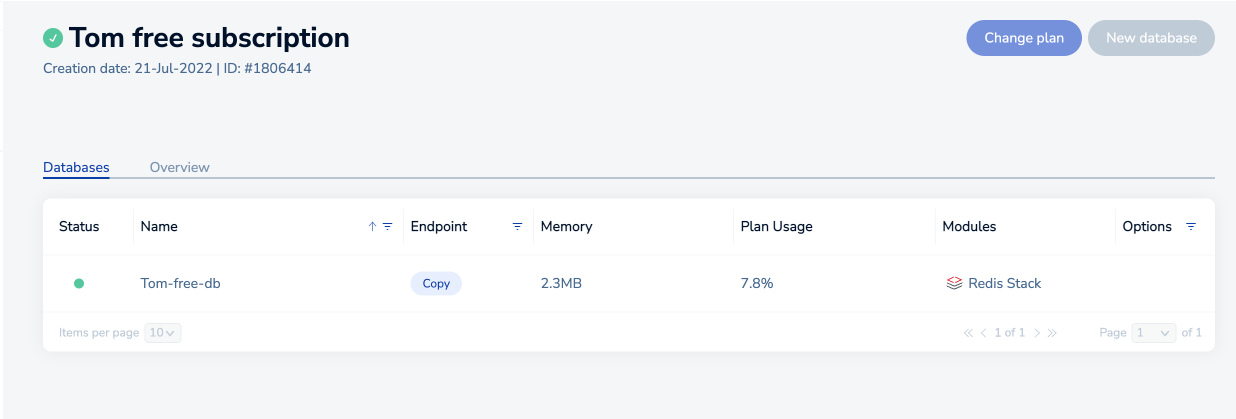
The Redis instance requires authentication by default. You can easily access these details by clicking into the instance and scrolling to the Security section:

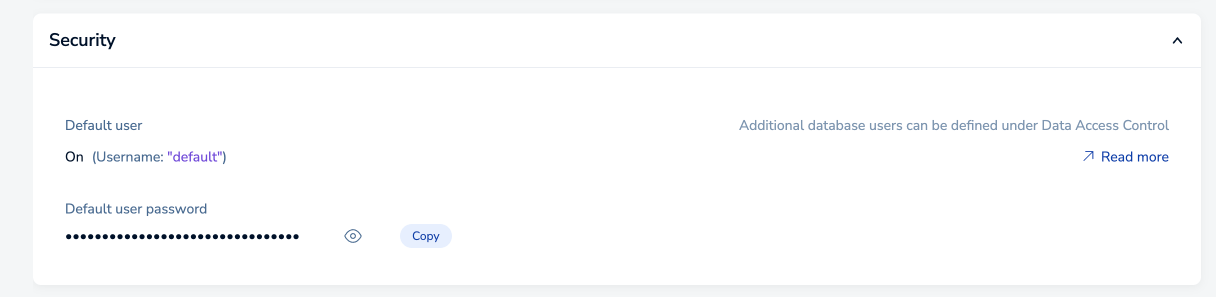
We'll need to add the username and password as environment variables.
import { Module } from '@nestjs/common';
import { CacheModule } from '@nestjs/cache-manager';
import { PokemonModule } from './pokemon/pokemon.module';
import * as redisStore from 'cache-manager-redis-store';
import { ConfigModule } from '@nestjs/config';

@Module({
  imports: [
    ConfigModule.forRoot()
    CacheModule.register({
      isGlobal: true,
      store: redisStore,
      host: process.env.REDIS_HOST,
      port: process.env.REDIS_PORT,
      username: process.env.REDIS_USERNAME, // new property
      password: process.env.REDIS_PASSWORD, // new property
      no_ready_check: true, // new property
    }),
    PokemonModule,
  ],
})
export class AppModule {}
You'll notice above I also set the no_ready_check property as true which solved the following error I got when deploying the NestJS app:
ReplyError: Ready check failed: NOAUTH Authentication required
In your local env file, these additional properties (username and password) can be empty strings as the Docker container does not require authentication.
When you push to production though and use this Redis instance, you'll need to add the respective environment variables to connect to the Redis Labs instance.
The 'Copy' button in the 1st Redis labs screenshot above contains the endpoint to access the Redis instance. It contains the port number at the end, so you'll need to remove it and use that as the port environment variable, and the rest of the string you can use as the host.
Here's the Github repo if you'd like to check out the code.
And that's it! What do you think? Let me know in the comments below.